
|
DIY - About making B9A / Noval Tube Socket Converters |
|
INDEX

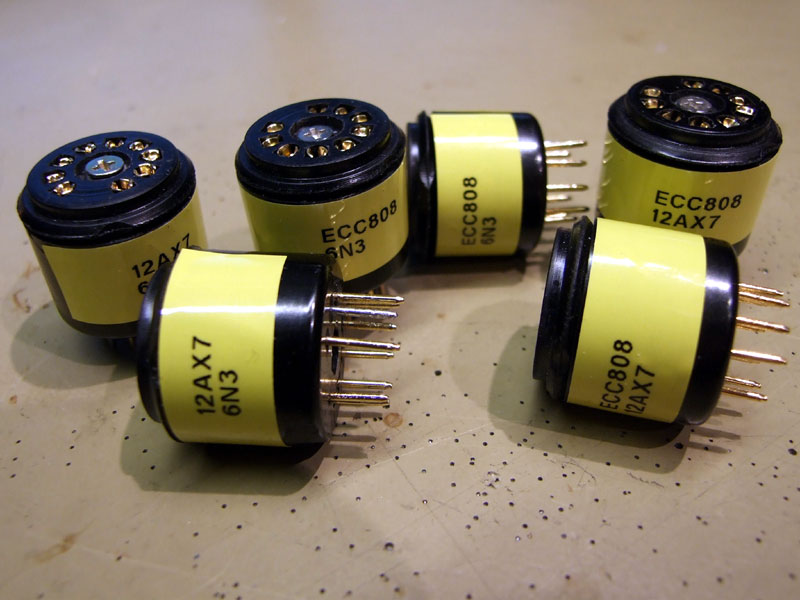
There is literately no limit what you can do with socket converters, as long as the tubes is electrical equivalent or close to equivalent. The socket converter enables a lot of tubes to be tested where you never tested them before. For instance, i'm now able to test the 6H1/6H2, 6922, 6H23n, 6DJ8 or ECC88 tubes in amplifiers made for 12AX7, ECC83, ECC81, 12AU7 or 12AT7.
 Stöd utvecklingen av Foobar2000 för mobiler (SmartPhones/Tablets/Android/iOS) Länk till Foobar2000 FUNDRAISER --> http://mobile.foobar2000.com/ |
'General' Making process
To make the socket converter you need some tools: Screw driver, Fine tip marking pen, Small to medium pliers, small wire cutter, some tools / needle to manipulate wires when reassembling, soldering tools.
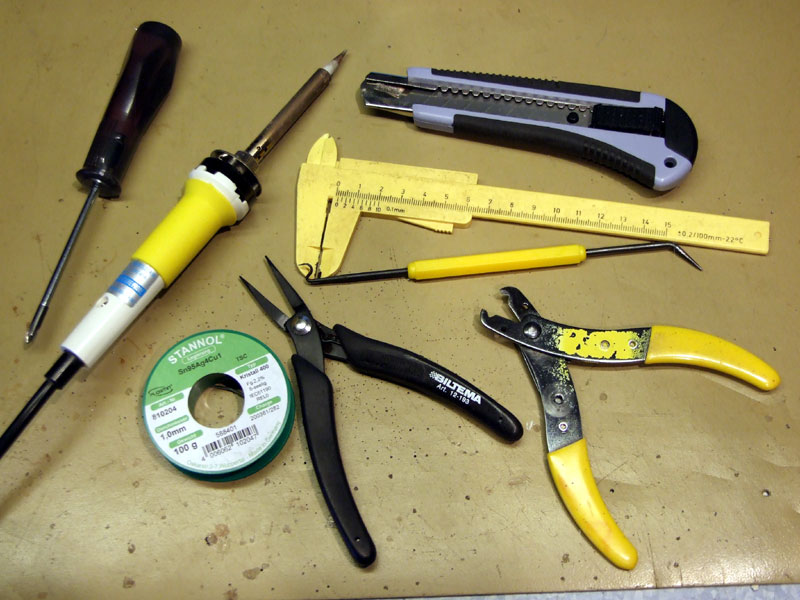
Some tools needed for the build
I start the build using standard 9-pin B9A / Noval 'Socket Saver', in original it's 'hard' wired pin to pin with nine (9) goldplated 17mm pins.
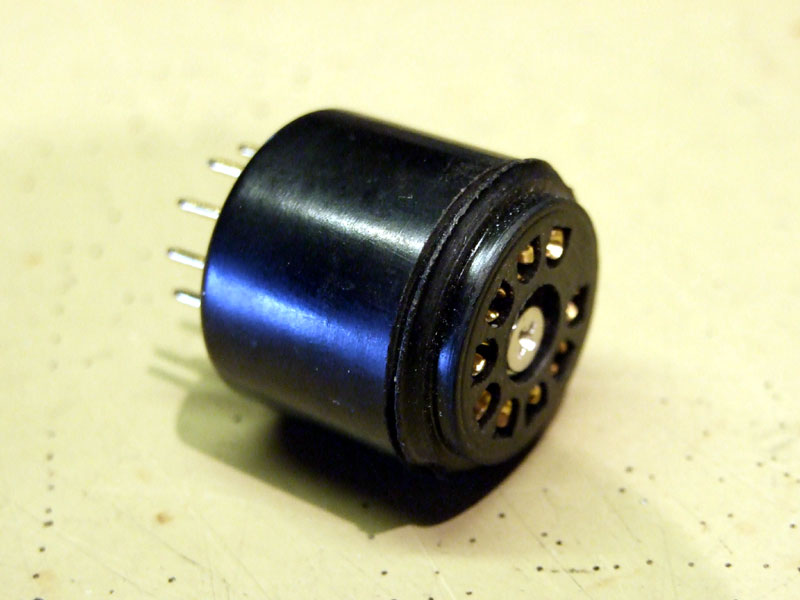
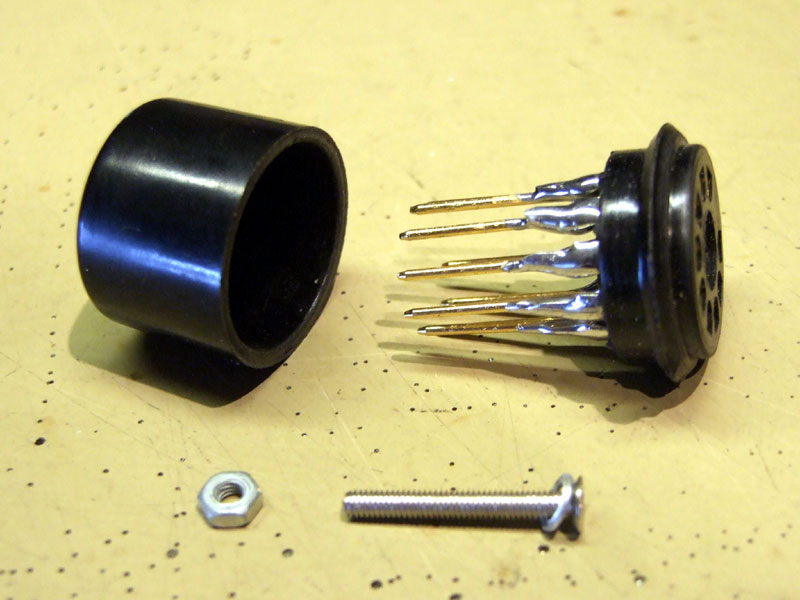
1. Using a screw driver, disassemble the 'socket saver'.
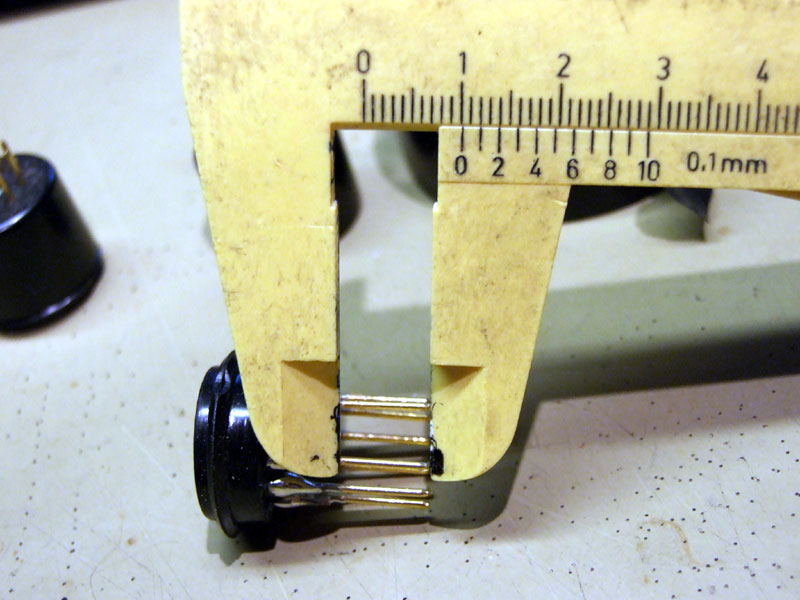
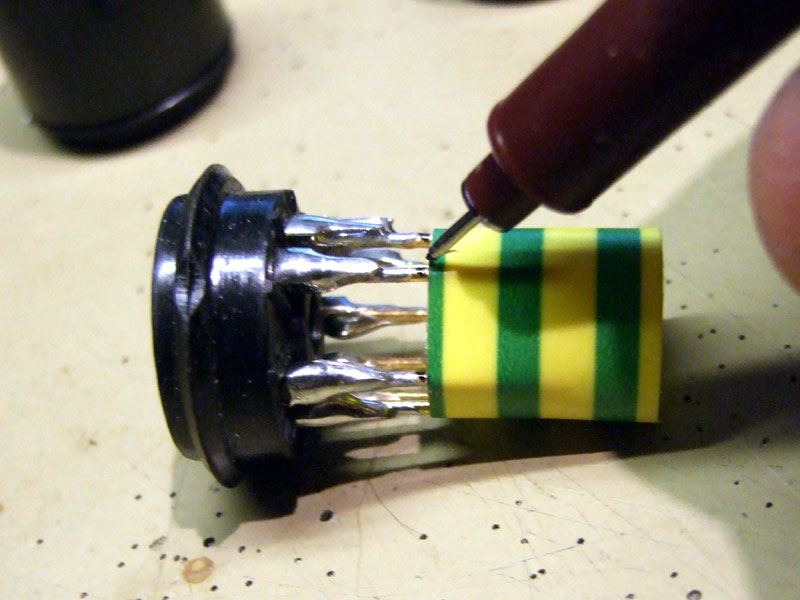
2. Measure and mark the appropriate length (About 10mm) on all the pins.
On the image abowe i use tape to make markings in parallel an all pins.
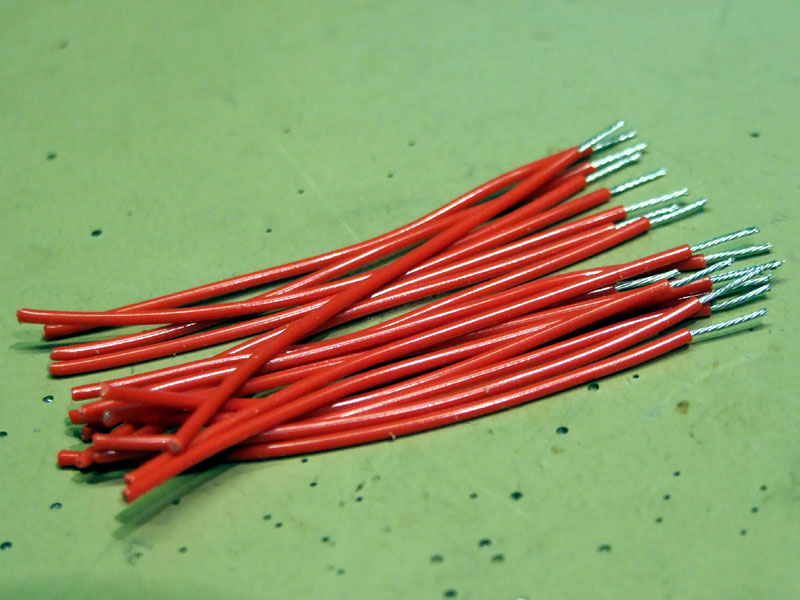
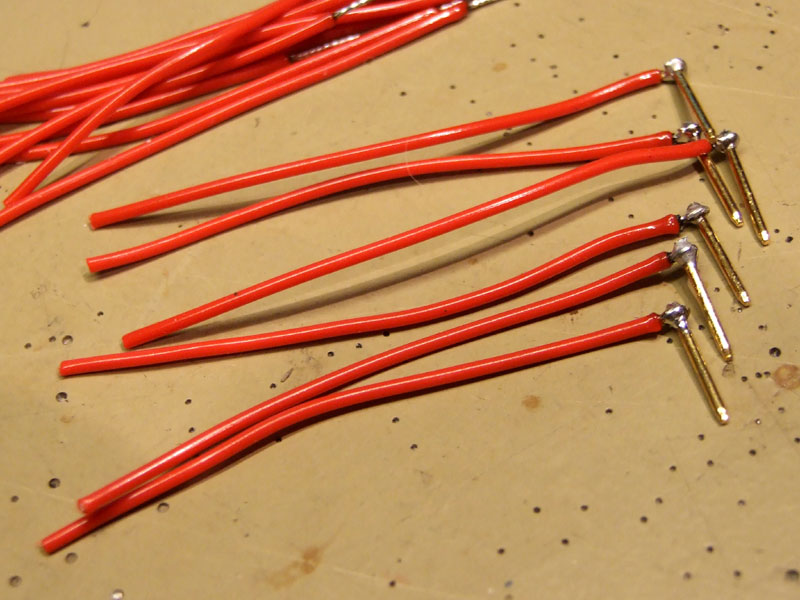
3. Make the interconnect wires, Needed numbers for each converter type is stated below. The interconnect wires is made with 5-6cm long insulated interconnect wires 0,6-0,7mm2(20-19AWG).
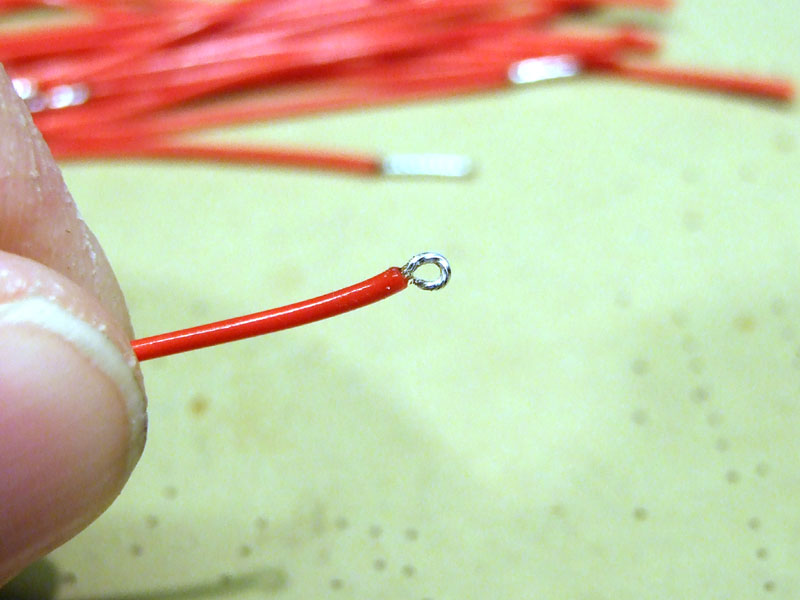
Strip insulation 6-7mm on one end of each wire and pre solder, make 'loop' to fit on socket pin.
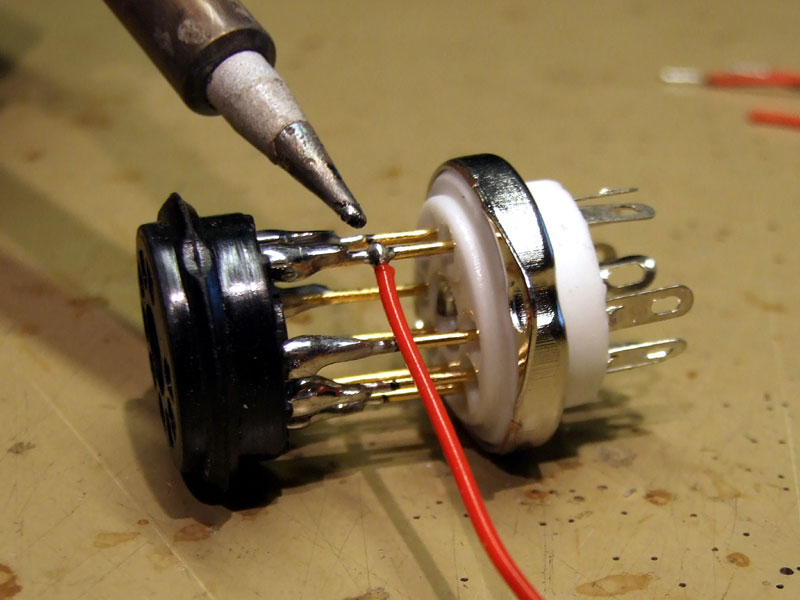
4. solder the interconnect wires to pin at 10mm mark, solder to pins stated for each converter type below. I use one 'extra', ceramic (White) B9A tube socket as support when soldering, the 'extra' socket have molded pin numbered in the ceramic, this helps keeping track of pin numbers.
5. Cut away the soldered pins, leave pin as stated for each converter type below.
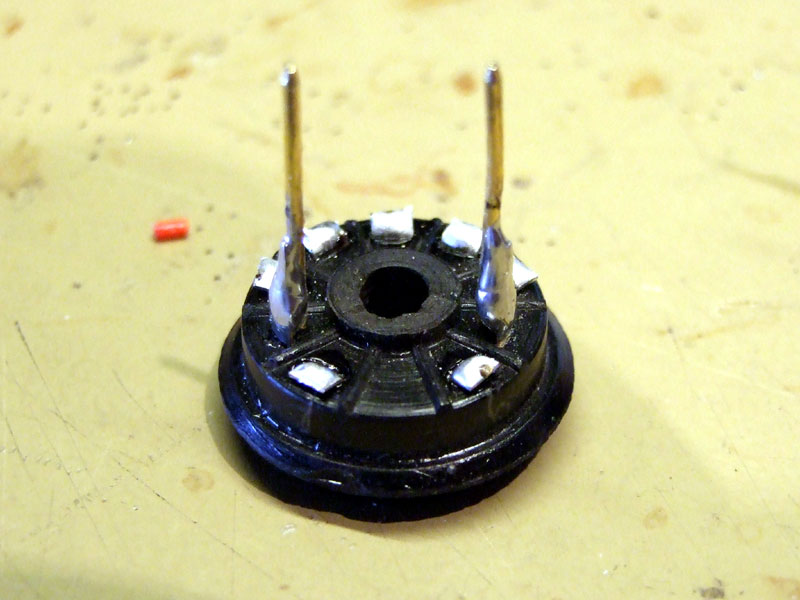
6. Insert the soldered pins in the holes in the socket cup as stated for each converter type below.
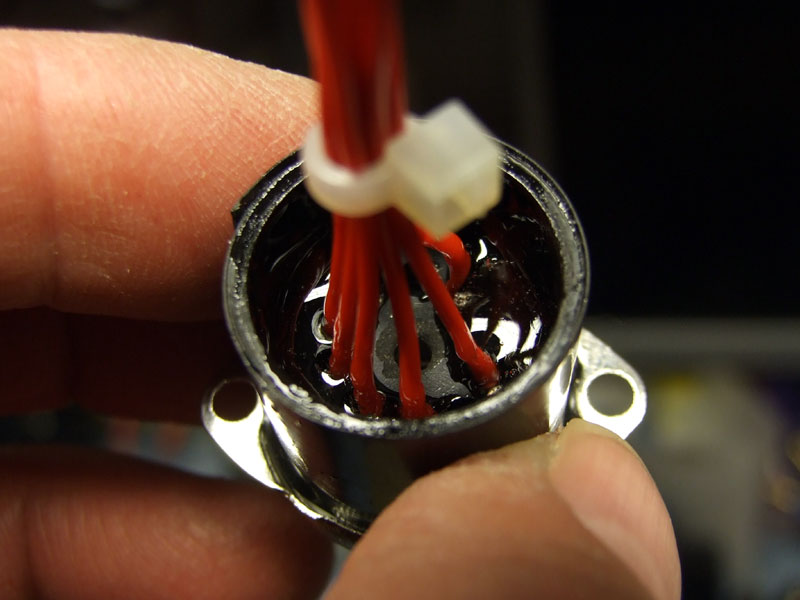
7. When the soldered pins is in place, fixate with 2-component epoxy glue.
(Allow the 2-component epoxy glue to harden for up to four hours)
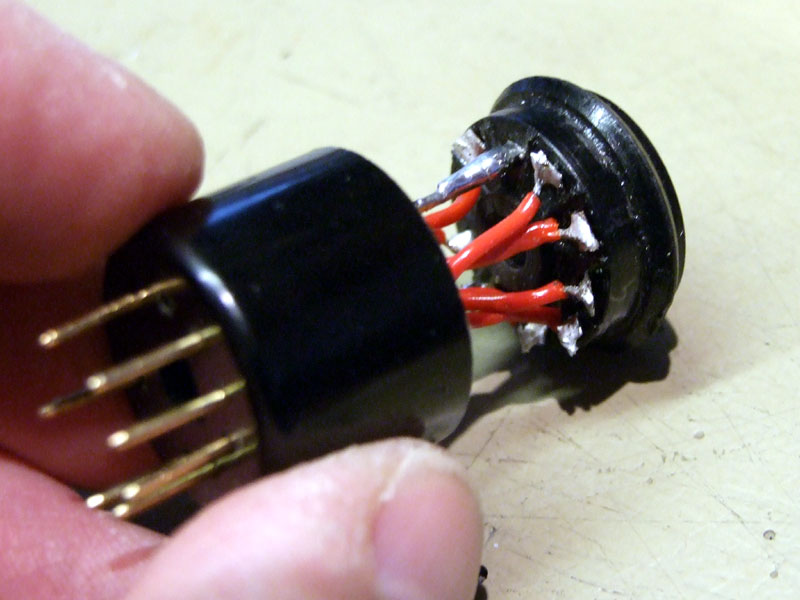
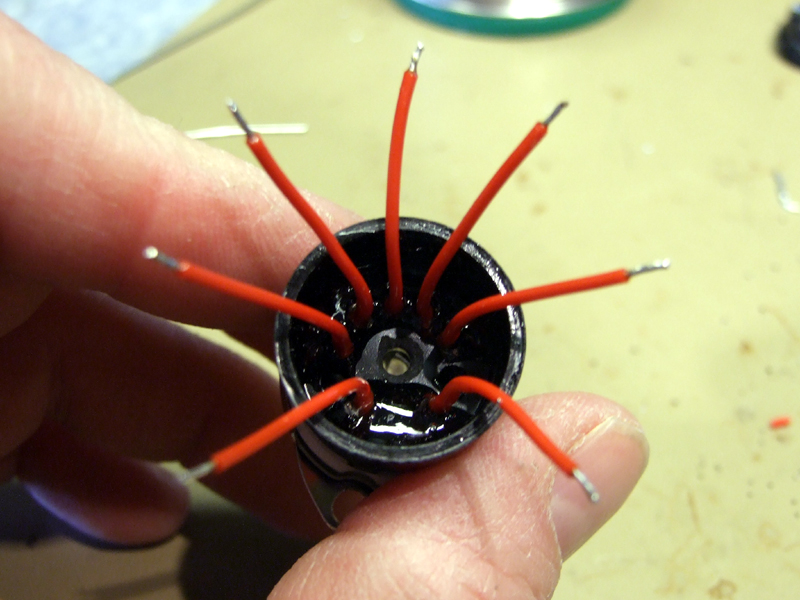
8. Fan out and trim down the insulated interconnect wires to the needed length.
9. Strip insulation about 3mm and pre solder.
10. Solder insulated interconnect wires according to table below
11. Reassemble
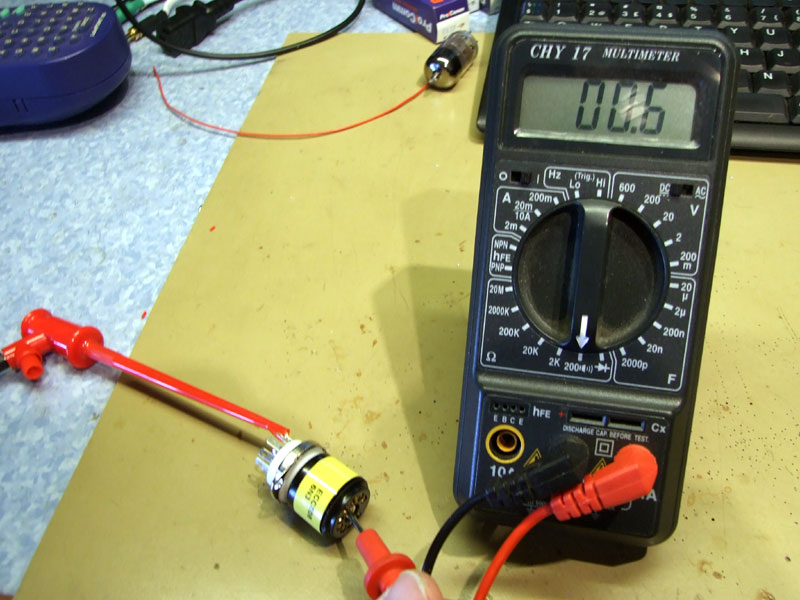
12. Test the ready made socket converter with ohm meter
|
|
|
6N3 (6H3n) --> 12AX7 (ECC83)
This converter is made for using the 12AX7 / ECC83 double triode in preamp / drive stage designed for Chinese 6N3 or Russian 6H3n.
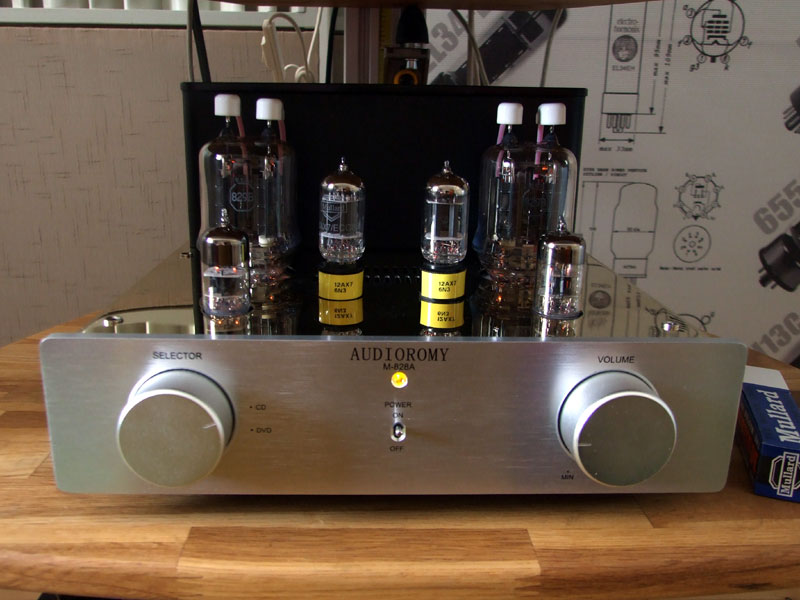
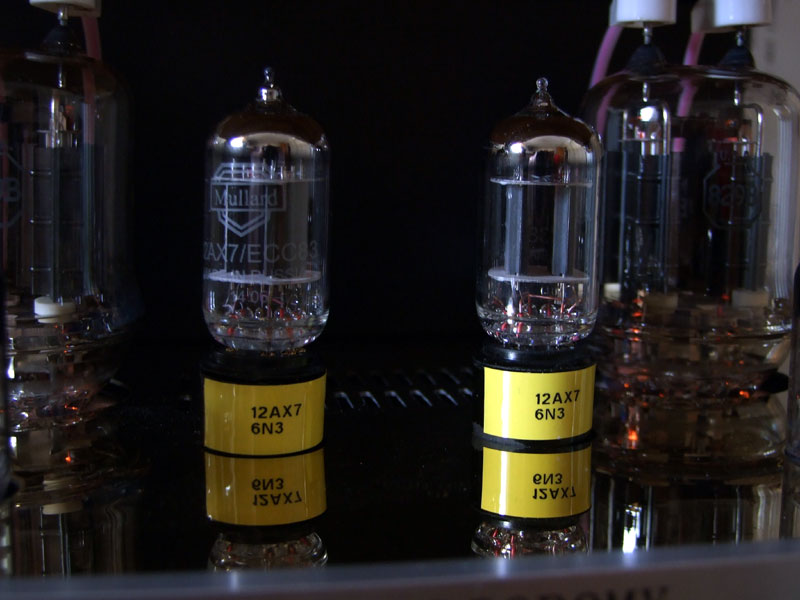
Provar 12AX7 sockel adapter + MULLARD 12AX7 'Longplate'
1. Disassemble the 'socket saver' (As shown above)
2. Mark the appropriate length on al the pins (As shown above)
3. Make five (5) 5cm insulated interconnect wires (As shown above)
4. solder the interconnect wires to pin 1, 2, 3, 4, and 5
5. Cut away the soldered pins, leave pin 6, 7, 8 and 9
6. Insert the soldered pins in the holes for pin 1, 2, 3, 4, and 5 in the socket cup (As shown above)
7. When the soldered pins is in place, fixate with 2-component epoxy glue (As shown above)
(Allow the 2-component epoxy glue to harden for up to four hours)
8. Trim down the insulated interconnect wires to the needed length (As shown above)
9. Strip insulation about 3mm and pre solder (As shown above)
10. Solder insulated interconnect wires according to table below
11. Reassemble (As shown above)
12. Test the ready made socket converter with ohm meter (As shown above)
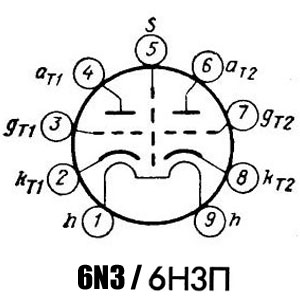 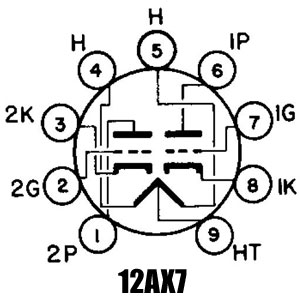
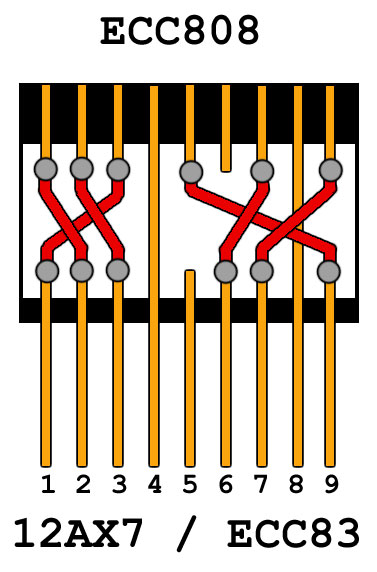
Från Pin --> Till Pin Not. ===================================================================== 6N3/6H3n 12Ax7 USAGE ===================================================================== 1 --> 4+5 (Need Wire) Filament 2 --> 3 (Need Wire) K1 3 --> 2 (Need Wire) G1 4 --> 1 (Need Wire) A1 5 --> (Cut Wire) Screen 6 --> 6 (Leave as is) A2 7 --> 7 (Leave as is) G2 8 --> 8 (Leave as is) K2 9 --> 9 (Leave as is) Filament ===================================================================== |
This converter is simple to build, pin 6,7,8,9 is unchanged (Straight pin to pin), pin 1,2,3,4 is wired in reversed order, pin5 on the 6N3 side is leaved out (Not used), finally pin5 on the 12AX7 side is hard wired to pin4. Done!
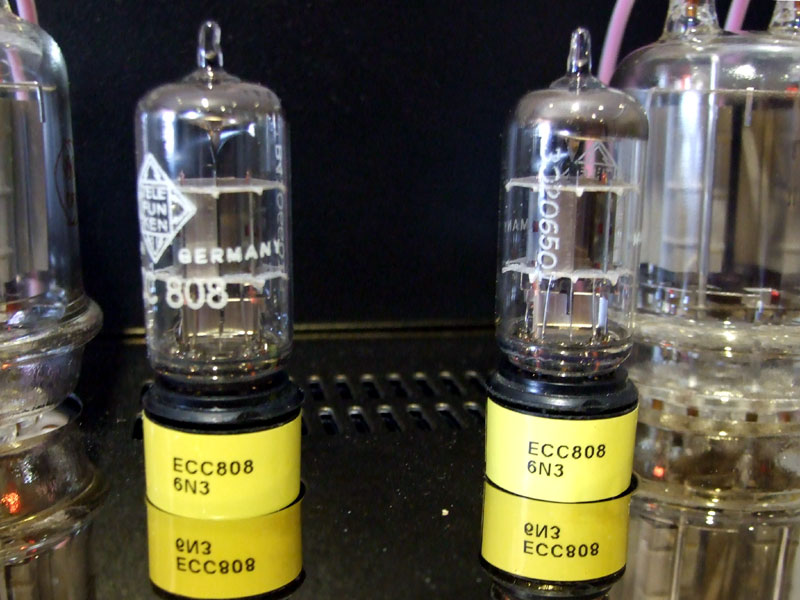
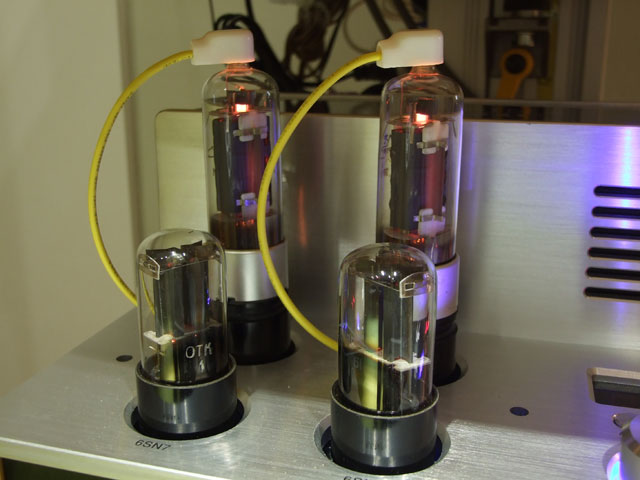
--> Testing the ECC808 adaptor 'Live' in an 'AUDIOROMY M-828A'
6N3 (6H3n) --> ECC808
This converter is made for using the rare ECC808 double triode in preamp / drive stage designed for Chinese 6N3 or Russian 6H3n.
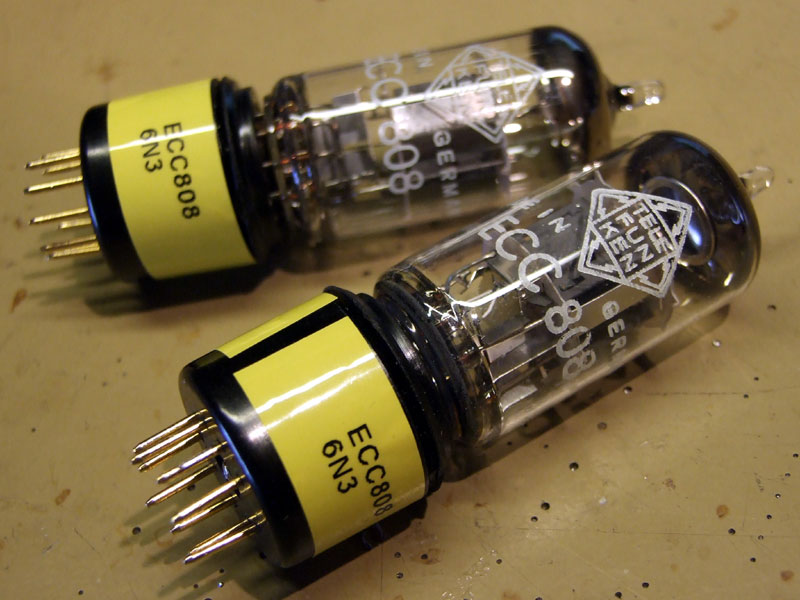
2x 6N3 --> ECC808 socket converters
1. Disassemble the 'socket saver' (As shown above)
2. Mark the appropriate length on al the pins (As shown above)
3. Make seven (7) 5cm insulated interconnect wires (As shown above)
4. solder the interconnect wires to pin 1, 3, 4, 5, 6, 7 and 9
5. Cut away the soldered pins, leave pin 2 and 8
6. Insert the soldered pins in the holes for pin 1, 3, 4, 5, 6, 7 and 9 in the socket cup (As shown above)
7. When the soldered pins is in place, fixate with 2-component epoxy glue (As shown above)
(Allow the 2-component epoxy glue to harden for up to four hours)
8. Trim down the insulated interconnect wires to the needed length (As shown above)
9. Strip insulation about 3mm and pre solder (As shown above)
10. Solder insulated interconnect wires according to table below
11. Reassemble (As shown above)
12. Test the ready made socket converter with ohm meter (As shown above)

Från Pin --> Till Pin Not. ===================================================================== 6N3/6H3n --> ECC808 USAGE ===================================================================== 1 --> 4 (Need Wire) Filament 2 --> 2 (Leave as is) K1 3 --> 1 (Need Wire) G1 4 --> 3 (Need Wire) A1 5 --> 6 (Need Wire) Screen 6 --> 7 (Need Wire) A2 7 --> 9 (Need Wire) G2 8 --> 8 (Leave as is) K2 9 --> 5 (Need Wire) Filament ===================================================================== |
--> Testing the ECC808 adaptor 'Live' in an 'AUDIOROMY M-828A'
|

12AX7 (ECC83) --> ECC808
This converter is made for using the rare ECC808 double triode in preamp / drive stage designed for 12AX7 or ECC83.

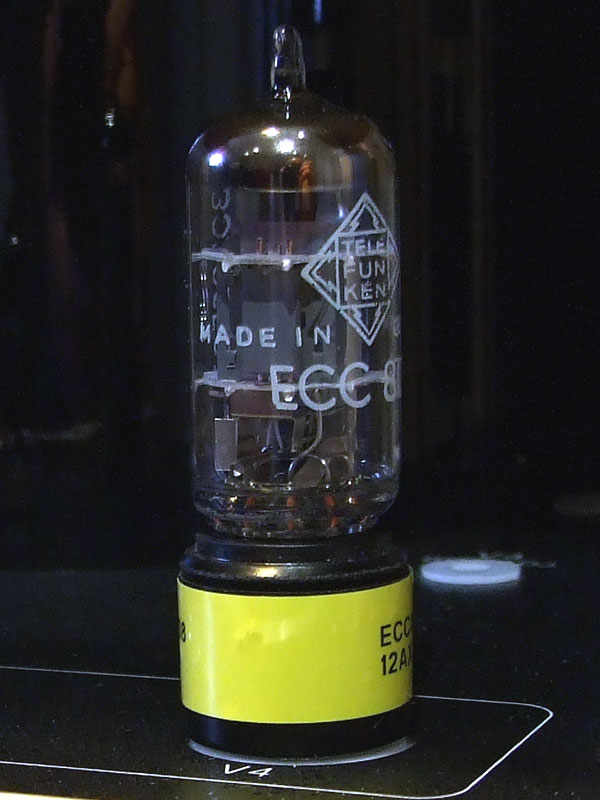
2x 12AX7 --> ECC808 socket converters
1. Disassemble the 'socket saver' (As shown above)
2. Mark the appropriate length on al the pins (As shown above)
3. Make seven (7) 5cm insulated interconnect wires (As shown above)
4. solder the interconnect wires to pin 1, 2, 3, 6, 7 and 9
5. Cut away the soldered pins, leave pin 4 and 8, remove pin5 (Not needed)
6. Insert the soldered pins in the holes for pin 1, 2, 3, 6, 7 and 9 in the socket cup (As shown above)
7. When the soldered pins is in place, fixate with 2-component epoxy glue (As shown above)
(Allow the 2-component epoxy glue to harden for up to four hours)
8. Trim down the insulated interconnect wires to the needed length (As shown above)
9. Fan out the wires, strip insulation about 3mm and pre solder (As shown above)
10. Solder insulated interconnect wires according to table below
11. Reassemble (As shown above)
12. Test the ready made socket converter with ohm meter (As shown above)
|
--> Testing the 12AX7 to ECC808 converter 'Live' in an 'YAQIN MC-10L'
|

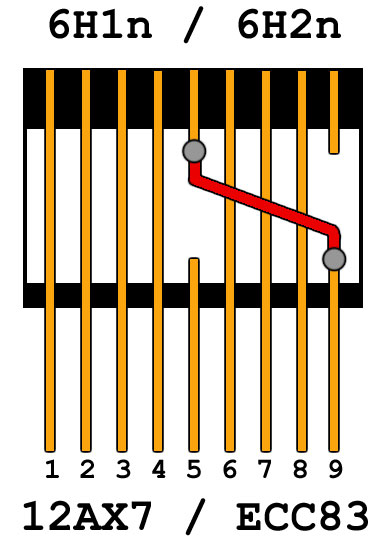
2x 12V 12AX7 (ECC83) --> 2x 6,3V 6H1n / 6H2n
This converter pair is made for using two Russian 6H1n / 6H2n with 6,3V filament to replace a pair of 12AX7 / ECC83 using 12,6V filament on pin4/5
The idea is to route the 12,6V filament on pin4/5 on one socket in series to both the 6H1n / 6H2n tubes, giving the needed 6,3V voltage drop over each tube.
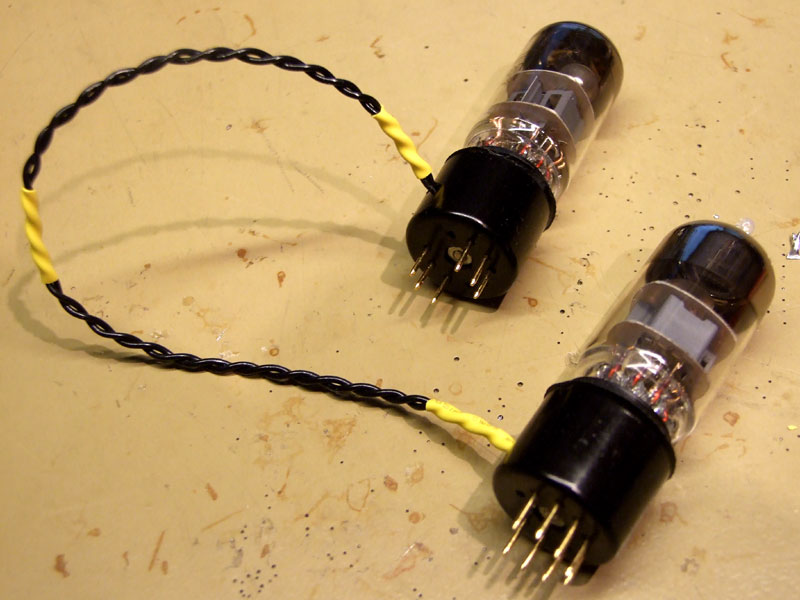
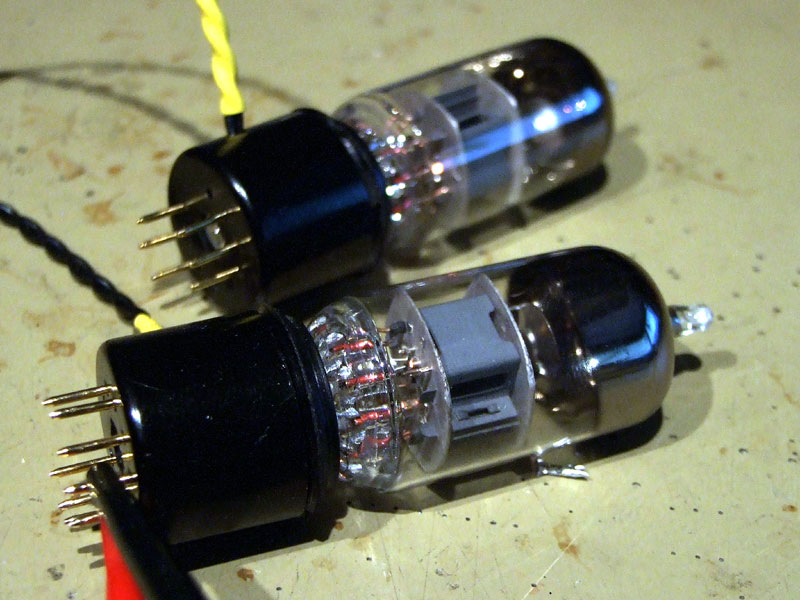
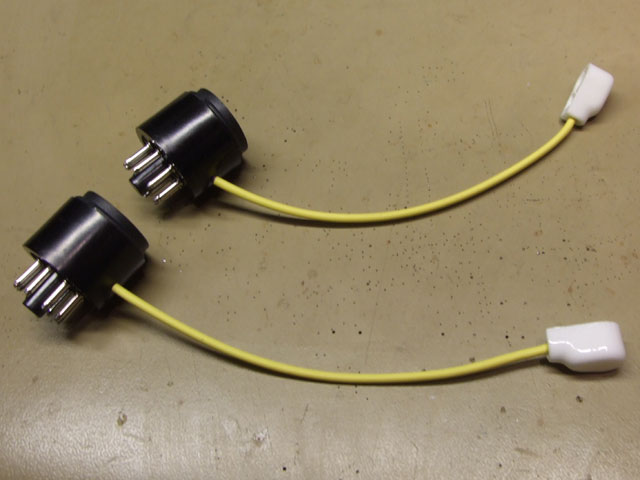
2x 12AX7 --> 2x6H1n/6H2n socket converters
1. Disassemble the 'socket saver' (As shown above)
2. Mark the appropriate length on pin4 on one of the converters (As shown above)
3. Drill a 3,5mm hole in both socket cups, place hole in center between pin1 and pin9
4. solder the interconnect wire to pin4
5. Cut away the soldered pin4, unsolder the remaining on pin4, leave the rest
6. Insert the soldered pin in the holes for pin4 in the socket cup (As shown above)
7. When the soldered pin is in place, fixate with 2-component epoxy glue (As shown above)
(Allow the 2-component epoxy glue to harden for up to four hours)
8. On the second converter, unsolder pin4 and pin5
9. Trim down the remaining pins on the 6H1/6H2 side(As shown above)
10. Route the two wires from the first converter to pin4 and pin5 on 6H1/6H2 side
11. Reassemble (As shown above)
12. Test the ready made socket converter with ohm meter (As shown above)
|
This converter could also be used to substitute a pair 12AU7 or 12AT7 with two 6H23n, 6922, 6DJ8 or ECC88 tubes.
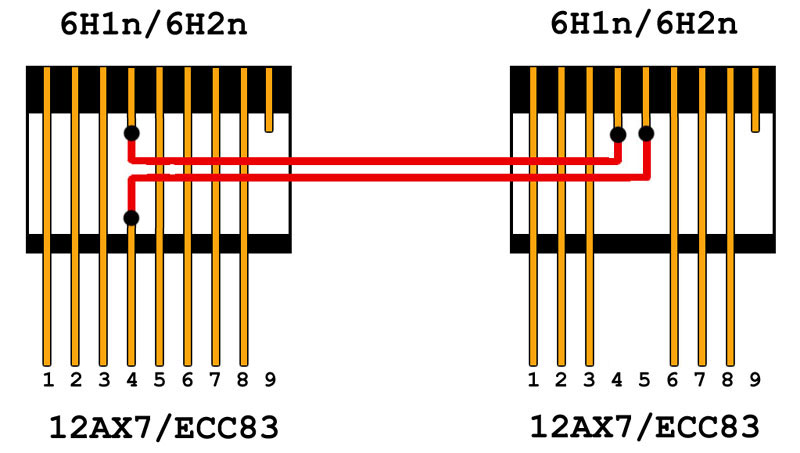
6,3V 12AX7 (ECC83) --> 6,3V 6H1n / 6H2n
This converter is made for using a single Russian 6H1n / 6H2n with 6,3V filament to replace a single 12AX7 / ECC83 wired for 6,3V filament on pin4+5 and pin9
1. Disassemble the 'socket saver' (As shown above)
2. Mark the appropriate length on pin5 and pin9 (As shown above)
3. n/a
4. solder the interconnect wire to pin5 and pin9
5. Cut away the soldered pin5 and pin9, unsolder the remaining on pin5 and pin9, leave the rest
6. Insert the soldered pin in the holes for pin5 and pin9 in the socket cup (As shown above)
7. When the soldered pin is in place, fixate with 2-component epoxy glue (As shown above)
(Allow the 2-component epoxy glue to harden for up to four hours)
8. Cut away interconnect wire on pin5 on 12AX7 side (Not needed)
9. Trim down pin5 and pin9 on the 6H1/6H2 side (As shown above)
10. Route the wire from pin9 from the 12AX7 side to pin5 on 6H1/6H2 side
11. Reassemble (As shown above)
12. Test the ready made socket converter with ohm meter (As shown above)
|
The build is quite easy, i simply route pin9 (Filament center) on the 12AX7 side to pin5 on the 6H1/6H2 side. This converter could also be used to substitute 12AU7 or 12AT7 with 6H23n, 6922, 6DJ8 and ECC88 tubes.
--> Testing the 12AXT to 6H1n/6H2n converter 'Live' in an 'YAQIN MC-10L'
Others...
Making tube socket konverter to use some 'odd' Chinese and Russian tubes to replace 5881 / KT77 and EL34 tube types.
The used tubes are Chinese 6P13P and Russian 6P13S + Russian 6P31S (KT77/EL34/EL36 type tubes) with top anode connector.
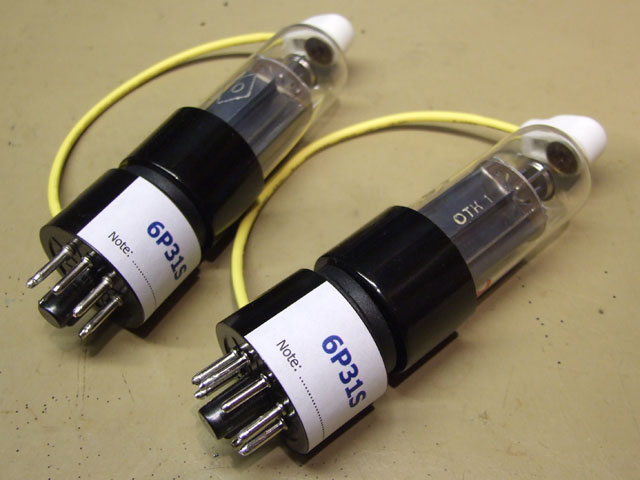
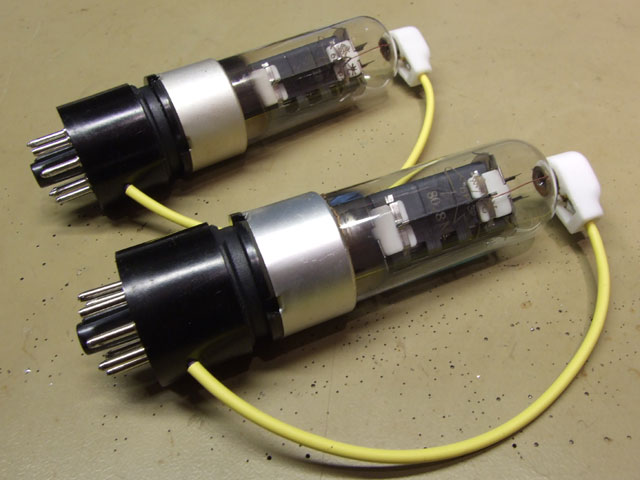
More about 5881 / EL34 to 6P13P / 6P13S / 6P31S Converters
Länkar / Referenser
Honors to the brains behind - 'Äras den som äras bör' - som talesättet säger. Som vanligt så är det inte jag som kommit på allt detta. Här hittar ni länkar till referenser och leverantörer.
[L1] www.dustinhome.se
[R1] Datablad för TELEFUNKEN ECC808
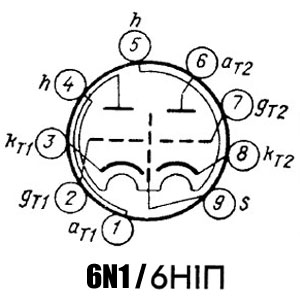
[R3] Datablad för 6N1
[R4] Datablad för 6H1n-EB
[R5] Datablad för 6H2n-EB
[R5] Datablad för E88CC/6922
[R6] Datablad för JJ-Electronic ECC83S
|
Disclaimer! The information given on this page is given on an 'As Is' basis and aimed for NON COMMERCIAL use only. The author can not be held responsible for any use of the information. Any registered product / trademark or company name on the page is the property of their respective owners. NOTERA! Det är helt personliga reflektioner och upplevelser vi skriver om på den här sidan, dessa är inte några 'Expert' kommentarer / utlåtanden. Vi rekommenderar INTE att någon ska göra dom ändringar / Modifieringar som vi gjort och som beskrivs på denna sida, då dessa HELT SÄKERT gör att alla garantier som leverantören utställt OMEDELBART upphör. Våra tester och slutsatser kan INTE, och ska INTE tas för intäkt att samma eller motsvarande resultat eller upplevelse kan erhållas eller efterliknas någon annanstans eller av någon annan - http://sm2yer.dyndns.org - ©1999-2013 G.Larsson / SM2YER |
Go Back!
©2010 SM2YER Goran